Working with Multiple Deployments
By default, each project has a single shared prod deployment and each developer working on the project has their own dev deployment.
For more advanced use cases, you may want to create more cloud deployments. For instance:
- Create a preview deployment for every feature branch you push.
- Give an isolated dev deployment to every coding agent.
- Shard your production workload across multiple deployments.
- Add a staging environment for your project.
Creating more deployments
Using preview deployments
Preview deployments are a simple way to automatically create a temporary deployment for each feature branch you create. These deployments are automatically cleaned up 5 days after they are created (14 days on the Professional, Business and Enterprise plans).
Convex preview deployments are currently a beta feature. If you have feedback or feature requests, let us know on Discord!
Setting up preview deployments
Preview deployments can be automatically created using the npx convex deploy
command. You will need to set the CONVEX_DEPLOY_KEY environment variable to a
preview deploy key. You can generate a preview deploy key in the dashboard from
the settings page of the project.
To deploy code to a preview deployment, use:
npx convex deploy --preview-name="my-preview-deployment-name"
This command will create a preview deployment if needed and reuse the existing preview deployment and its data when one with the same name already exists.
Use --preview-create instead of --preview-name to delete and recreate the
preview deployment every time.
If you’re deploying your code from
Vercel,
Netlify, Cloudflare Pages, or
GitHub Actions, you can simply use npx convex deploy. The preview name will
automatically be determined. With that workflow, you can reuse the same deploy
command for preview deployments and production deployments: for preview
deployments, set the CONVEX_DEPLOY_KEY environment variable to a preview
deploy key, and in production, set it to your production environment’s deploy
key.
Seeding initial data
If you want to automatically create sample data when a preview deployment is
created, you can use --preview-run:
npx convex deploy --preview-create="my-preview-deployment-name" --preview-run=<functionName>
Replace <functionName> by the name of a Convex function that will be ran if a
preview deployment is created. --preview-run is ignored npx convex deploy
doesn’t create a preview deployment.
Note that if the function call fails, the deploy command will fail, but the
new preview deployment will have already been provisioned. Best course of action
is to fix the issue in the function and redeploy.
From the command line
Interactively
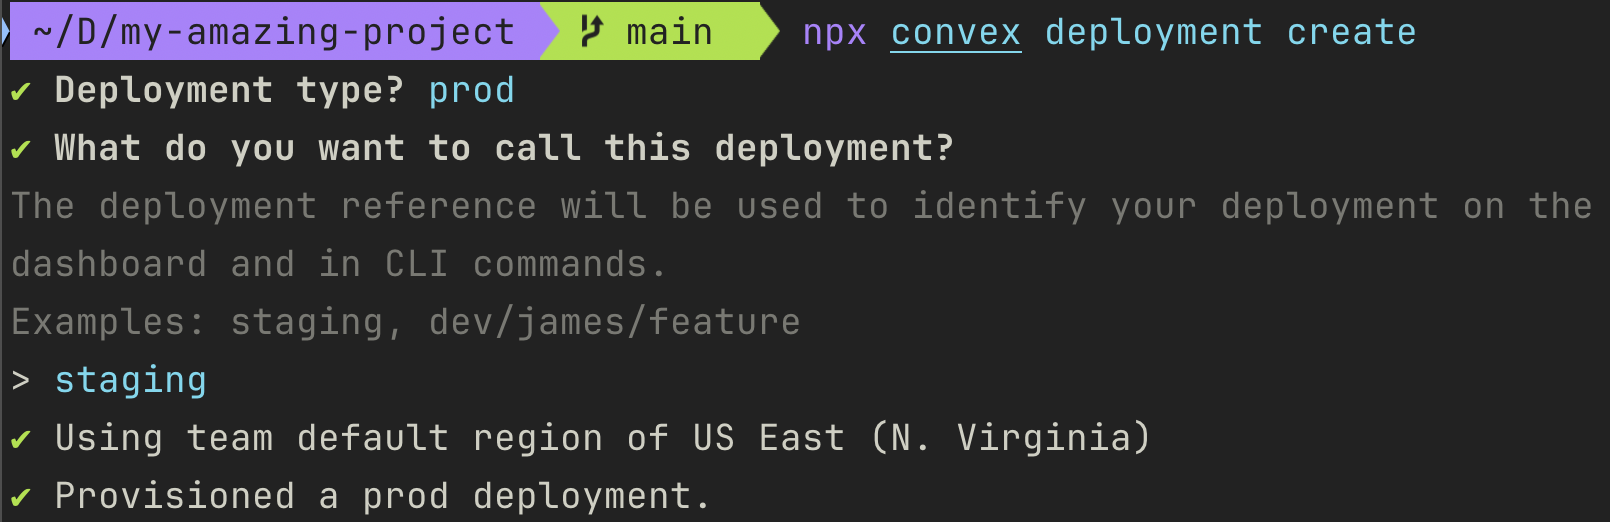
To create a new deployment manually, run the following command in your project:
npx convex deployment create
This command will allow you to interactively choose the deployment type, region, and reference for the new deployment.
To use npx convex deployment create, you must use the convex NPM package
version 1.34.0 or later.
From a script
npx convex deployment create can be used non-interactively in setup scripts,
e.g. to provision a fresh dev deployment per CI run or per agent worktree:
npx convex deployment create <reference> --type=<type> [options] [--select]
# For instance:
# npx convex deployment create dev/james/feature-payment-integration --type=dev --region us --expiration "in 7 days" --select
When including --select, the deployment you created will be used by the
npx convex commands you run after.
The reference is a string that uniquely identifies the deployment within a
project. It must be 3 to 100 characters and contain only alphanumeric
characters, dashes, and slashes. The reference is used by the Convex dashboard
and by npx convex to identify the deployment, so we recommend using
descriptive names.
For ready-made setup scripts that wire this into Codex, Conductor, Cursor worktrees, and T3 Code, see Agent Mode → Worktree setups.
Through the API
You can also create deployments through the management API.
Targeting different deployments
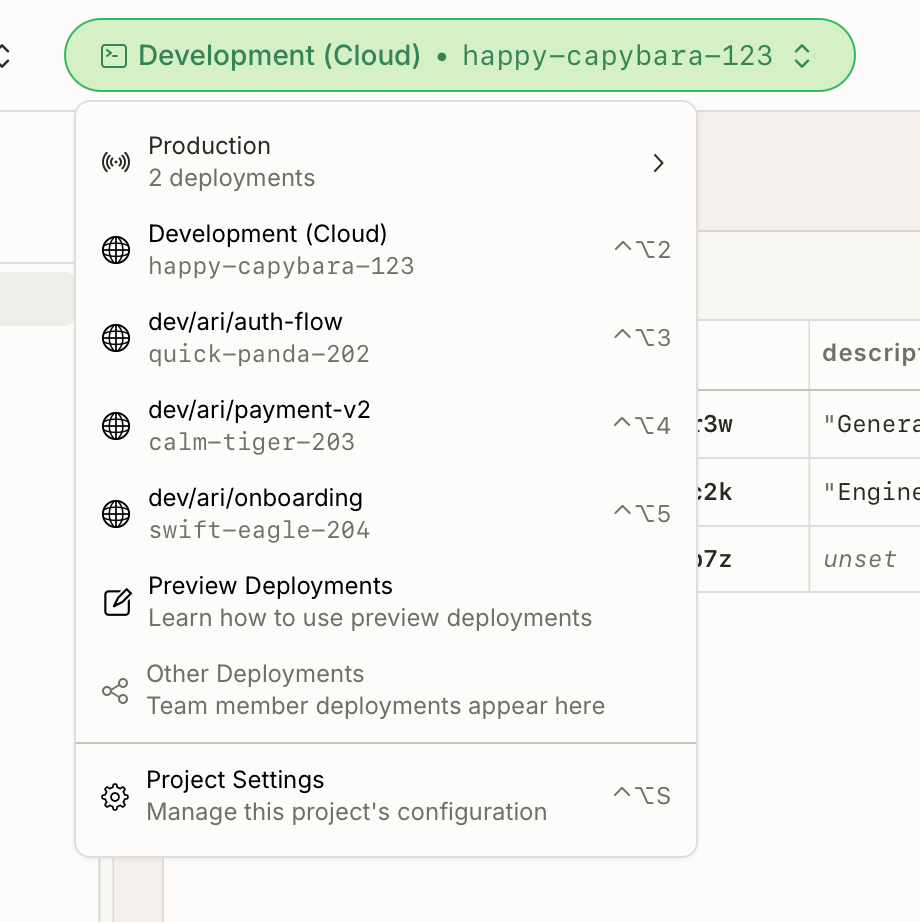
If you’re manually managing multiple dev deployments, you can use
npx convex deployment select to change the deployment used by npx convex dev
and other commands:
# To select a deployment in the same project:
npx convex deployment select dev/james/feature-payment-integration

# To select a deployment in another project:
npx convex deployment select my-project:dev/james/feature-payment-integration

# To select a deployment in another team:
npx convex deployment select my-team:my-project:dev/james/feature-payment-integration
If you only need to run a single command on another deployment, you can use
--deployment:
npx convex env list --deployment dev/james/feature-payment-integration
To use npx convex deployment select and --deployment, you must use the
convex NPM package version 1.34.0 or later.
Scoping a deploy key to a single deployment
If you want to hand a single deployment off to a coding agent or CI job, mint a
deploy key scoped just to it and save it to .env.local as CONVEX_DEPLOY_KEY:
npx convex deployment token create agent-token --save-env
Once that env var is set, subsequent npx convex commands run against that
deployment only. See
Creating and deleting deploy keys from the CLI
for the full options.
Deployment types
There are three types of cloud deployments in Convex:
| Type | |||
|---|---|---|---|
| Reference | dev/[creator] | preview/[branch] | production |
| Expiration | — | 5 days (Free and Starter plans) 14 days (Professional, Business, and Enterprise plans) | — |
| Dashboard permissions | Can be edited by every team member | Can only be edited by project or team admins | |
| Server logs in clients | Server logs are sent to the client | Server logs are not sent to the client | |
| Server errors | Details of server errors are sent to the client | Details of server errors are not sent to the client (unless the error is wrapped in ConvexError) | |
| Dashboard edit confirmation | No protection against accidental edits | Asks for confirmation before editing | |
The table above shows the default settings for deployments in a type. You can modify the settings of an individual deployment from the deployment’s settings page in the dashboard.
Limits
Every deployment you create counts towards the deployment limit of your team.
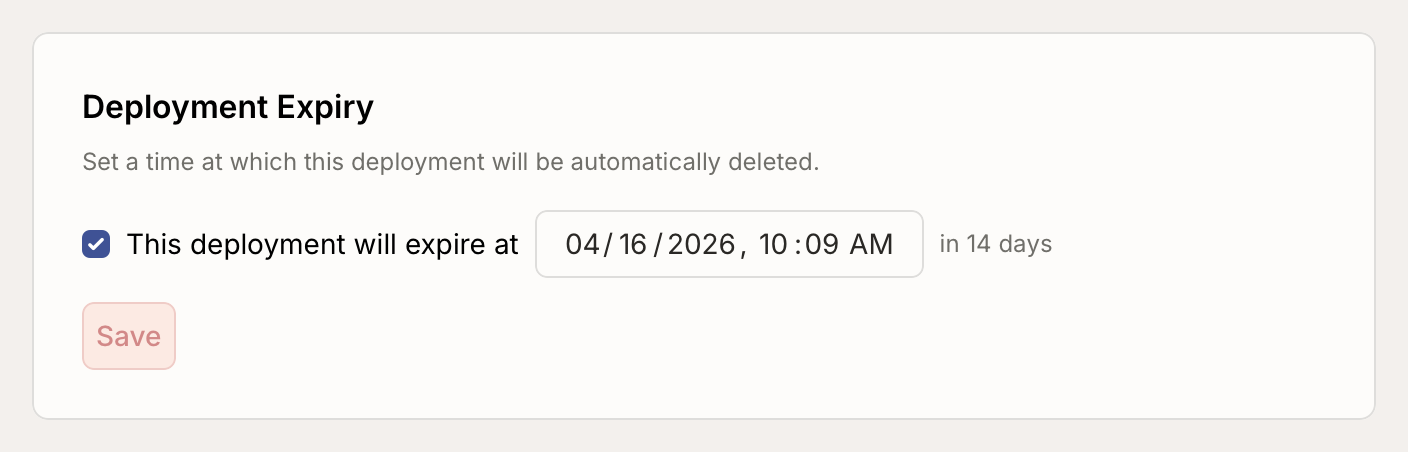
You can set an expiration date when creating a deployment with --expiration.
Run npx convex deployment create --help to learn more.
You can change the expiration time for an existing deployment in the dashboard deployment settings.