Using Cursor with Convex
For AI agents: see llms.txt for the complete documentation index. Markdown versions are available by adding .md to a page URL or requesting Accept: text/markdown.
Cursor, the AI code editor, makes it easy to write and maintain apps built with Convex. Let's walk through how to set up Cursor for the best possible results with Convex.
Cursor and Convex
Cursor works great with Convex out of the box. Because Convex is one type-safe TypeScript backend (database, functions, real-time sync, and file storage), Cursor writes code that's caught at compile time, stays transactional, and scales without extra infrastructure, which is plenty to build a chat app, a collaborative editor, or a multiplayer game. Adding the plugin lets you leverage the full power of Convex: Cursor reads your real deployment through the MCP server instead of guessing, catches its own type and deploy errors as it works, and follows the idiomatic Convex patterns the skills encode.
Install the Convex plugin in Cursor
The official Convex plugin makes Cursor work better with your Convex project. It includes:
- Tools that let your agent securely interact with your dev deployment (e.g. read the data/logs/insights or run functions).
- Development hooks that keep your generated types in sync and catch type and deploy errors as the agent works.
- Rules, skills, and specialized agents that teach your agent how to use Convex the most effectively.
See the Agent Plugins overview for everything the plugin bundles.
To install the plugin, go to the Customize page of the Agents window, search for the Convex plugin and click Add.
Alternatively, you can run /add-plugin convex from an agent conversation.
Cursor plugins aren't available in Cloud Agents or the Cursor CLI. In those environments, we recommend installing rules and the MCP server manually.
Manual setup
If you'd rather not install the plugin, you can wire up rules and the MCP server yourself.
Add Convex .cursor/rules
To get the best results from Cursor put the model specific .mdc files in your
project's .cursor/rules directory.
We're constantly working on improving the quality of these rules for Convex by using rigorous evals. You can help by contributing to our evals repo.
Setup the Convex MCP Server
The Convex CLI comes with a Convex Model Context Protocol (MCP) server built in. The Convex MCP server gives your AI coding agent access to the your Convex deployment to query and optimize your project.
Quick Install
You can click this handy deep-link below:

Manual Install
To get started with Cursor, open "Cursor Settings > Tools & Integrations", click
on "New MCP Server", and add a "convex" section to "mcpServers" in the
mcp.json file that's opened.
{
  "mcpServers": {
    "convex": {
      "command": "npx",
      "args": ["-y", "convex@latest", "mcp", "start"]
    }
  }
}
You can also install the Convex MCP for just one project.
After adding the server, ensure the "convex" server is enabled and lit up green (it make take a minute the first time while the NPM package downloads).
Now start asking it questions like:
- Evaluate my convex schema and suggest improvements
- What are this app's public endpoints?
- Run the
my_convex_functionquery
Tips and tricks
Run Convex during development
Run Convex (npx convex dev) in a terminal while you build so your functions
deploy and your app updates live.
With the plugin installed, its development hooks keep your
generated types in sync
as the agent works, so it won't get stuck in the linting loop that stale types
can otherwise cause. Without the plugin, keeping npx convex dev running is
what keeps those types fresh.
Keep your requests small
The best results when using agentic LLMs can be found when keeping the amount of changes you want to make small and git commit frequently. This lets you be more specific around the context you provide the agent and it means the agent doesn't need to do a lot of searching for context.
After each successful prompt or series of prompts it is a good idea to commit your changes so that its simple to rollback to that point should the next prompt cause issues.
Update and reference your README.md
The agent needs context about the specific business goals for your project. While it can infer some details from the files it reads, this becomes more challenging as your project grows. Providing general information about your project gives the agent a helpful head start.
Rather than including this information in each prompt, it's better to write a comprehensive README.md file in your project root and reference it.
Some people advocate for crafting a Product Requirements Document (PRD), this may be a good idea for more complex projects.
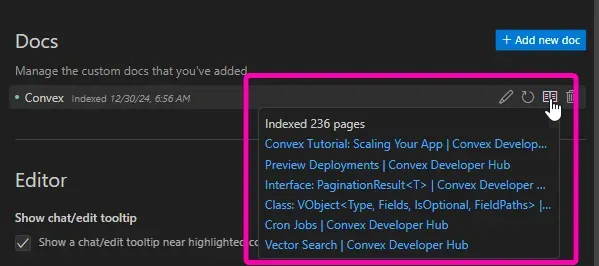
Add Convex docs
Adding Convex docs can let you specifically refer to Convex features when building your app.
From Cursor Settings > Indexing & Docs > Docs add new doc, use
the URL "https://docs.convex.dev/home"

Cursor will then index all of the Convex docs for the LLM to use.
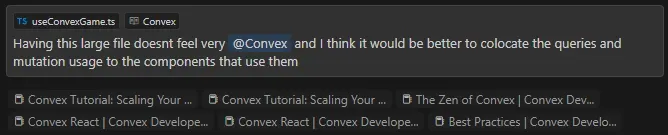
You can then reference those docs in your prompt with the @Convex symbol.
You can perform the above steps for https://stack.convex.dev/ too if you would like to provide even more context to the agent.