OAuth Applications
Convex allows third-party app developers to manage a user's projects on their behalf through Application Tokens.
Application tokens are obtained through the OAuth authorization code flow, which will be described in detail below.
There are two types of OAuth tokens:
- Team-scoped tokens that are authorized to create new projects, create new deployments within projects, and have read and write access to data and functions to every project on the team.
- Project-scoped tokens that can create new deployments and access data and functions within a specific project.
All application tokens are also scoped to the permissions of the member that authorized usage. If the member is removed from the team, or their permissions changed, the permissions of the token will also change.
Creating an application
To obtain application tokens, you'll first have to register an OAuth application with Convex, which can be done in your Team Settings.
To register an application, you'll need to provide a name for the application and a set of redirect URIs. Redirect URIs are used to return users to your application once they have authorized you to access their Convex team or project. You may add up to 20 redirect URIs, including ones pointing to localhost for testing.
Once you've created your application, it will be in the "Unverified" state. In the Unverified state, you'll be able to obtain application tokens for your own team, but not for other teams. We recommend testing your application in the Unverified state before requesting verification.
You may request verification by clicking the ⋮ button next to your application, and clicking "Request Verification".
Verification requirements
To have your application be verified and be accessible for all Convex users, it must meet the following criteria:
- The application description has an explanation of the capabilities and planned future capabilities of your application.
- The application name, redirect URIs, and content of the redirect URIs do not attempt to misrepresent another organization, business, or entity.
- The listed redirect URIs belong to your organization.
The Convex team will respond to your verification request by email if more information is required.
Implementing OAuth
Convex implements OAuth 2.0 (RFC 6749)'s Authorization Code Grant flow. Convex also optionally supports the PKCE extension (RFC 7636) to improve security.
- Convex provides two authorization endpoint URLs, depending on whether you
are generating team-scoped or project-scoped tokens:
https://dashboard.convex.dev/oauth/authorize/teamhttps://dashboard.convex.dev/oauth/authorize/project
- Convex's token endpoint is
https://api.convex.dev/oauth/token.
We'll walk through the authorization flow step by step. However, we recommend using an OAuth 2.0 client library to help construct the required URLs and API calls.
Step 1: Redirect the user to Convex's authorization endpoint
In your application, navigate the user to:
https://dashboard.convex.dev/oauth/authorize[TOKEN_SCOPE]?client_id=[CLIENT_ID]&redirect_uri=[REDIRECT_URI]&response_type=code&state=[STATE]
[TOKEN_SCOPE]should be replaced with "team" or "project"[CLIENT_ID]should be replaced with your app's client ID as assigned by Convex.[REDIRECT_URI]is a URL on your application's domain. The user will be redirected back to that URL after authorizing.- Important note: You'll need to provide us with all the redirect URIs that your application might use (likely just one). This is required to prevent a malicious application from masquerading as yours, but redirecting to a different callback.
[STATE]is an optional arbitrary string. It's up to you how to encode it, but your application will use this to decide what to do with the auth token after it receives it.
Remember to URI-encode all the parameters!
This brings the user to a page that looks like this:
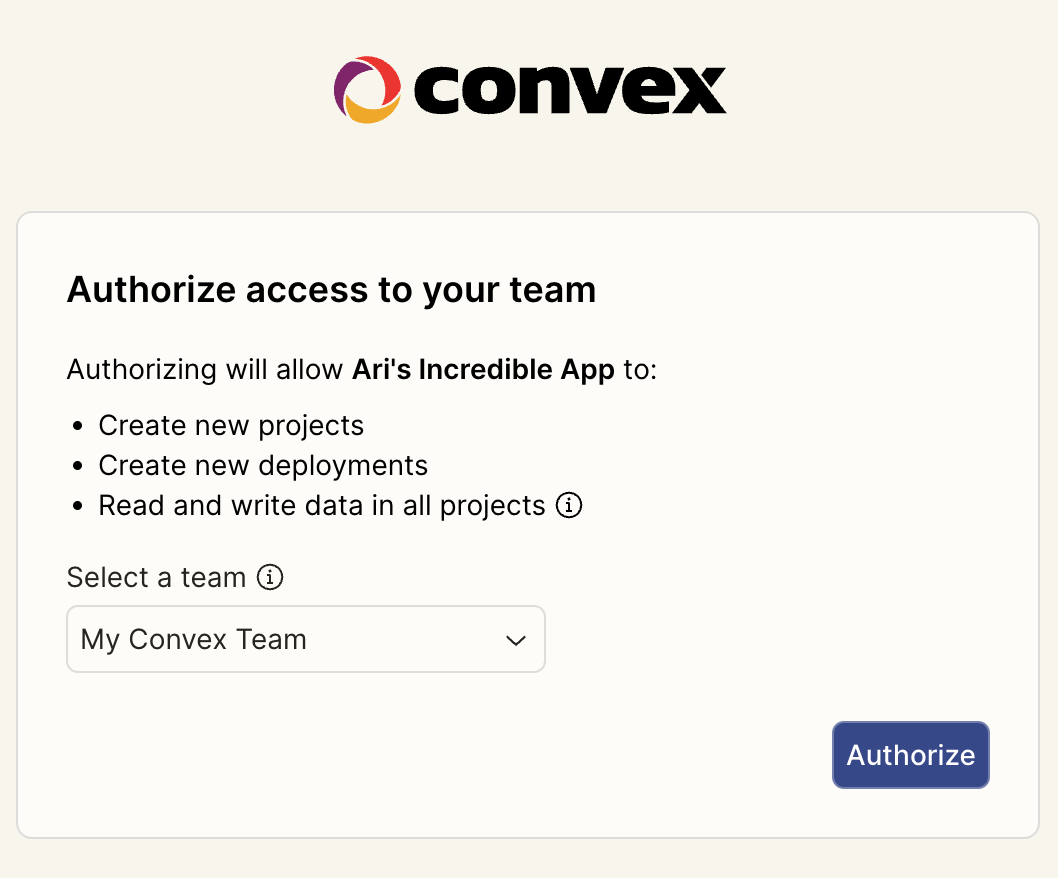
From here, the user can select which team they'd like to authorize access to. If using the project flow, the user will also be able to select an existing project or create a new project. After they click "Authorize", the page will redirect to your redirect URL.
Step 2: Receive the callback
The authorization endpoint brings the user to your redirect URI with the code
and state query parameters populated. If your redirect_uri was
https://yourapp.example.com/cb, the result would look like:
https://yourapp.example.com/cb?code=[CODE]&state=[STATE]
where state is the same value you provided earlier, and code is a randomly
generated string like 895c59eb98504a5bbaa7ad2e49cf4817. This code is not
the final auth token - you'll need to exchange it for one within 10 minutes.
Step 3: Exchange the authorization code for a project token
Your application should make an HTTP POST request to the following endpoint:
https://api.convex.dev/oauth/token
The body should have content type application/x-www-form-urlencoded and look
like the following:
client_id=[CLIENT_ID]&client_secret=[CLIENT_SECRET]&grant_type=authorization_code&redirect_uri=[REDIRECT_URI]&code=[CODE]
client_idis the same one used to construct the authorization endpoint URL.client_secretis your app's secret assigned by Convex.grant_typeis alwaysauthorization_code.redirect_uriis the same one used to construct the authorization endpoint URL.codeis the authorization code provided to your callback.- Note that a
codecan only be exchanged once for an access token.
- Note that a
If all provided values are correct, Convex's API returns a JSON response containing:
{
	"access_token": "team:my-team|AAAAAA==",
	"token_type": "bearer"
}
The access_token is the application token!
Using PKCE (RFC 7636)
Convex supports this extension to the Authorization Code grant type. Only the
S256 method is allowed. PKCE protects a leaked authorization code from being
used by an attacker even if your client secret is not private (e.g. if it has to
be embedded in a client-side application).
OAuth client libraries typically support PKCE already, but to implement it manually:
- Each time you request user authorization, before redirecting the user,
construct a random string called the
code_verifier. It's recommended that you generate a random 32-byte value and base64url-encode it. - Calculate
code_challenge = base64url(sha256(code_verifier)). This will be a 43-character string. - Redirect the user to authorization endpoint as before
(
/oauth/authorize/[TOKEN_SCOPE]), but additionally provide the parameterscode_challenge=[CODE_CHALLENGE]&code_challenge_method=S256. - When exchanging the authorization code for a token, additionally provide the
parameter
code_verifier=[CODE_VERIFIER].